Undercoat Rakes and Slickers for a Siberian Husky
If you're a Siberian Husky owner, you know the struggle is real when it comes to shedding. That beautiful, fluffy double coat that keeps them warm in the harshest winters can quickly turn your home into a furry wonderland, especially during those infamous "coat blows." Trying to manage it with just any old brush feels like bailing out a sinking ship with a teaspoon. This guide will walk you through the specialized tools – undercoat rakes and slicker brushes – that are absolutely essential for keeping your Husky's coat healthy, your home a little cleaner, and your sanity largely intact.
Why Your Husky Needs Specialized Grooming Tools: Understanding the Double Coat
The Siberian Husky's coat isn't just fur; it's a marvel of natural engineering, perfectly adapted for extreme cold. But this incredible feature is also the source of much of our grooming effort. Understanding what makes their coat so unique is the first step to appreciating why generic brushes just won't cut it.
The Arctic Heritage of the Husky Coat
Imagine your Husky's ancestors, the sled dogs of the Chukchi people, braving brutal Siberian winters. Their survival depended on a coat that could insulate them perfectly, protecting them from icy winds, snow, and freezing temperatures. This isn't a single layer of hair; it's a sophisticated double coat. There's a soft, dense undercoat – almost like wool – that traps warm air close to their body, and then a coarser, protective outer coat (guard hairs) that repels water, snow, and dirt.
This design is truly brilliant for their native climate, but it means a lot of hair. And that hair doesn't just stay put. As seasons change, especially when warmer weather arrives, they need to shed that dense undercoat to prevent overheating. This isn't just a light shedding; it's a monumental event known as a "coat blow," where clumps of undercoat literally fall out. Trying to get this out with a regular brush is like trying to comb a sheep with a toothbrush – it's just not designed for the job.
The Never-Ending Cycle of Shedding (Especially During Coat Blow)
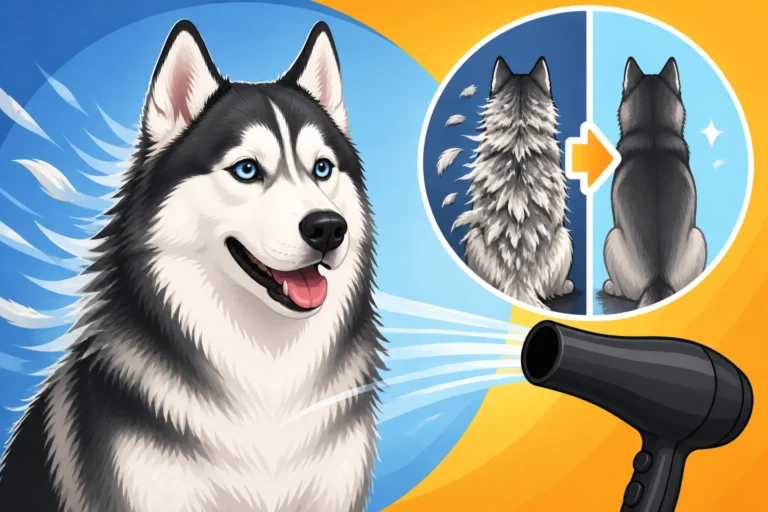
While the coat blow is the most dramatic shedding period, typically happening twice a year during spring and fall, Siberian Huskies shed year-round to some extent. It's a continuous process where old hairs are replaced by new ones. During the coat blow, it feels like an avalanche of fur. You'll find it everywhere: clinging to your clothes, decorating your furniture, even tumbling like tumbleweeds across your floors. If you don't actively remove this dead undercoat, it can mat, trap moisture, and lead to skin irritations or hot spots. It can also make your Husky incredibly uncomfortable and prone to overheating in warmer temperatures.
The guard hairs, while shed less dramatically, also need care to stay clean and free of minor tangles. This is where different tools come into play, each with a specific role in maintaining that majestic coat. Without the right approach and the right tools, you're fighting an uphill battle against Mother Nature herself. And trust me, Mother Nature usually wins unless you come prepared. Regular, thorough grooming, especially during those heavy shedding times, is crucial for both your Husky's health and your household's cleanliness. Spring and Fall Sheds in a Siberian Husky talks more about what to expect.
Unpacking the Undercoat Rake: Your Heavy-Duty Shedding Ally
When you're facing a full-blown Husky shedding event, an undercoat rake is your first line of defense. This isn't a gentle beauty treatment; it's a serious tool designed for a serious job: pulling out vast quantities of dead, loose undercoat without damaging the protective guard hairs.
What an Undercoat Rake Does (And Doesn't Do)
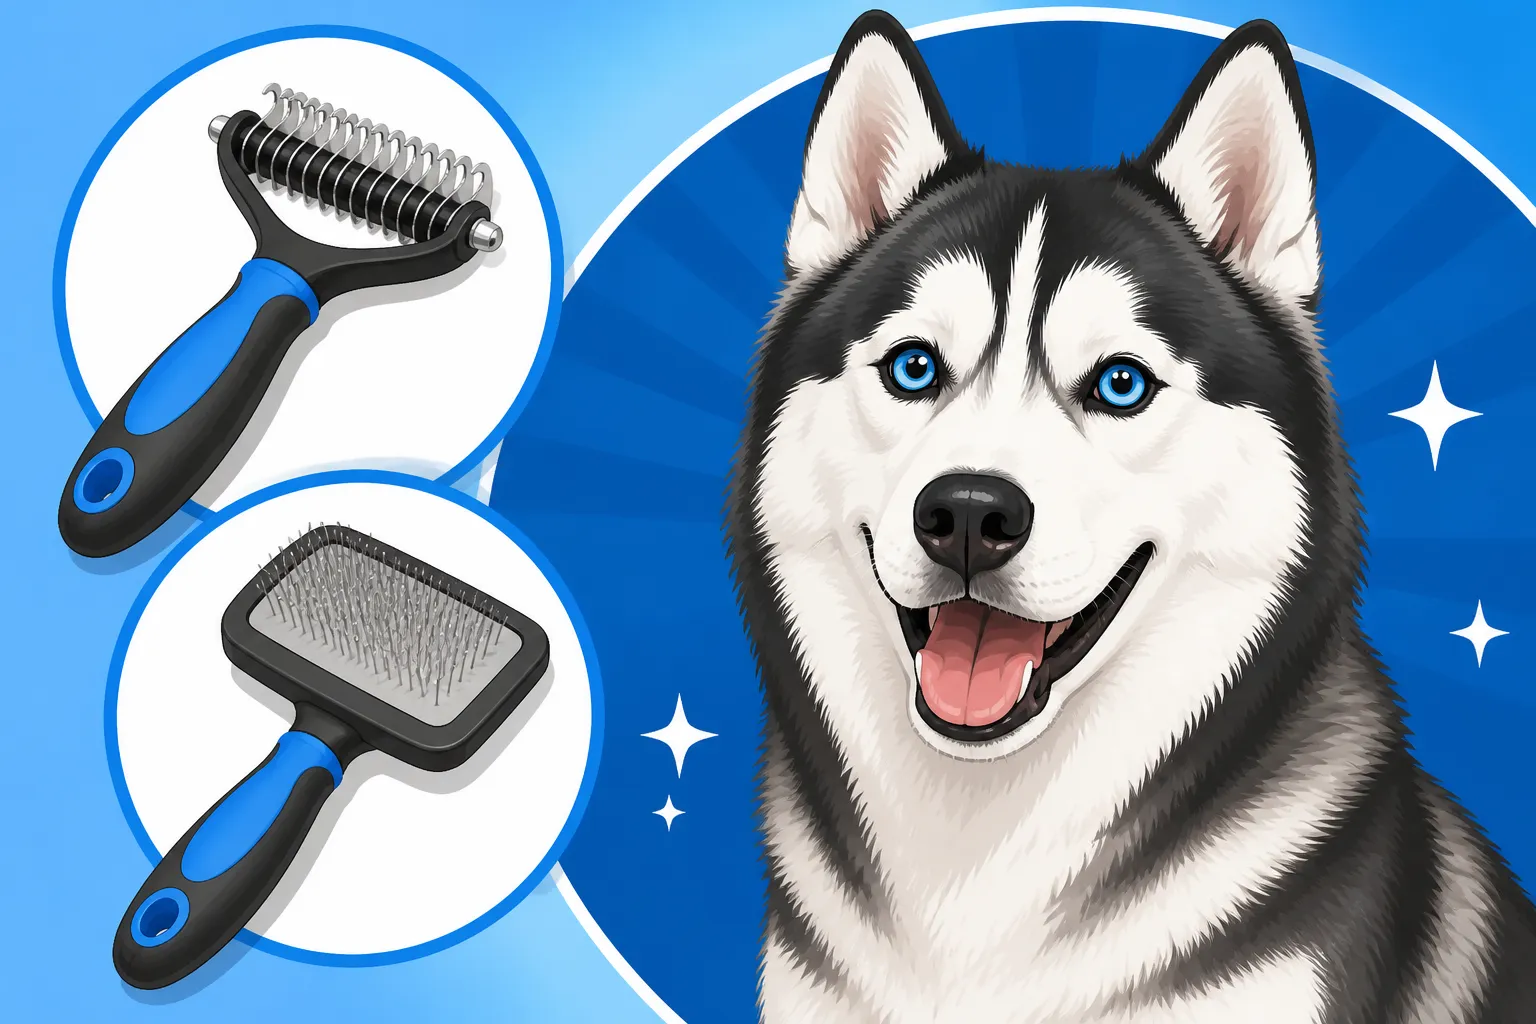
An undercoat rake features a row of blunt, widely spaced metal teeth that are specifically designed to penetrate the dense topcoat and reach deep into the undercoat. Its primary function is to "rake" out the loose, dead fur that your Husky is shedding, preventing it from matting and becoming impacted. Think of it as a miniature garden rake for your dog's inner fluff. When used correctly, it should glide through the topcoat, snagging and pulling out only the loose undercoat. The magic happens when you see impressive amounts of fur coming out with each stroke – it's both gross and incredibly satisfying.
What an undercoat rake doesn't do is smooth the topcoat or remove surface tangles with precision. It's not for detangling the outer layer, nor is it meant for daily maintenance grooming where the goal is just tidying up. Its purpose is singular: significant undercoat removal. You shouldn't be using this tool on delicate areas or areas with very short fur, as it can cause irritation or even pull healthy hair. It's truly a tool for the thick, dense areas of the body, like the back, sides, and haunches, where the undercoat really builds up.
Different Types of Undercoat Rakes and Their Uses
Undercoat rakes come in a few variations, and understanding them can help you pick the best one for your Husky.
- Single-Row Rakes: These are the most common, featuring one row of widely spaced teeth. They're excellent for general undercoat removal, especially during a heavy shed. The spacing of the teeth is key – you want them wide enough to penetrate without pulling too much healthy fur.
- Double-Row Rakes: Some rakes have two rows of teeth, often staggered. These can be even more effective at grabbing loose undercoat but require a lighter touch to avoid snagging. They can be particularly good for extremely dense coats or during the peak of a Siberian Husky Coat Blow and the Six Weeks It Lasts.
- Rotary or Rotating-Tooth Rakes: These rakes have teeth that rotate, which can help prevent snagging and reduce pulling on the hair. They can be a bit gentler for dogs with sensitive skin or for those who are new to being groomed with a rake. While they might feel smoother, they still perform the same core function of undercoat removal.
When choosing, consider the density of your Husky's coat and their comfort level. For most Huskies, a sturdy single-row rake with comfortable handle is a great starting point. Brands like the FURminator deShedding Tool (though technically a rake-like deshedder) or various unbranded undercoat rakes found on Chewy or Amazon are popular choices that get the job done.
Techniques for Effective Raking
Using an undercoat rake effectively means working methodically and gently. Here’s how to do it:
- Start Clean and Dry: Always use an undercoat rake on a clean, completely dry coat. Wet fur can mat easily and make the rake pull uncomfortably.
- Section the Coat: Don't try to tackle the whole dog at once. Work in small sections, starting from the neck and working your way back. For areas like the hindquarters or tail, you might need to lift the topcoat with one hand to expose the undercoat better.
- Use Long, Gentle Strokes: With minimal pressure, use long strokes in the direction of hair growth. You're not scrubbing; you're gently pulling. Let the tool do the work.
- Watch for Resistance: If the rake snags or feels like it's pulling healthy hair, stop. This could mean you're hitting a mat, applying too much pressure, or going against the grain of the fur. Back off and try a different angle or section.
- Clean the Rake Frequently: The rake will quickly fill with fur. Stop and pull the collected fur off the teeth frequently to maintain its effectiveness. You'll be amazed at how much comes out!
- Avoid Over-Raking: While it's tempting to keep going when you're getting so much fur, avoid excessive raking in one spot. This can irritate your Husky's skin. Move on once a section feels like most of the loose undercoat has been removed. Remember, the goal is to remove dead undercoat, not all of it.
Consistent, gentle use of an undercoat rake during shedding seasons will dramatically reduce the amount of loose fur around your house and keep your Husky's coat healthy and comfortable. This is a primary step in Daily Raking Through a Siberian Husky Blow.
Mastering the Slicker Brush: For Topcoat Shine and Surface Tangles
Once the heavy lifting of undercoat removal is done, or for everyday tidying, the slicker brush steps in. This tool is designed to address the outer layers of the coat, making it smooth, shiny, and free of minor surface tangles.
The Role of the Slicker in Husky Grooming
The slicker brush is characterized by its fine, short wires packed closely together, usually set on a flat or slightly curved surface. These wires are typically angled, which helps them gently grip and remove loose fur from the topcoat, as well as smooth out any minor mats or tangles on the surface. For a Husky, the slicker brush is primarily used after the undercoat rake has done its job of removing the bulk of the loose undercoat. It helps to:
- Smooth the Topcoat: It gives that beautiful, glossy finish to the guard hairs, enhancing their natural sheen.
- Remove Stray Hairs: Catches any remaining loose hairs, both undercoat and guard hairs, that the rake might have missed or brought to the surface.
- Address Minor Tangles: Gently works through small tangles or mats that form in the outer layer, particularly behind the ears, on the legs, or around the tail.
- Distribute Natural Oils: Helps spread the natural oils produced by your Husky's skin throughout the coat, promoting health and shine.
While it's versatile, it's not the tool for deep undercoat removal, especially during a heavy blow. Trying to use a slicker brush on a heavily impacted undercoat will be frustrating for you and uncomfortable for your Husky, as it will just skim the surface or get stuck.
Choosing the Right Slicker for Your Husky's Coat
Slicker brushes come in various sizes and bristle stiffness. For a Siberian Husky, you'll generally want a medium to large-sized slicker with firm but flexible pins.
- Size Matters: A larger brush covers more surface area, making grooming more efficient, especially for a medium to large breed like a Husky. However, a smaller one can be handy for more delicate areas like the face or legs.
- Pin Type: The pins can be soft, firm, or extra-firm. For the Husky's thick double coat, a firm slicker brush is usually best, as it needs to be robust enough to penetrate the outer coat without being overly harsh. Ensure the tips of the pins are not too sharp; rounded tips are ideal to prevent scratching the skin.
- Self-Cleaning Feature: Some slicker brushes have a push-button mechanism that retracts the pins, making it incredibly easy to remove the collected fur. This is a fantastic feature that saves a lot of time and hassle. You can often find these self-cleaning options on Amazon or Chewy.
Always run the slicker brush over your own skin lightly to test its feel. If it feels scratchy or uncomfortable on your arm, it will feel the same or worse on your Husky.
Gentle Techniques for Using a Slicker Brush
The key to using a slicker brush on a Husky is gentleness and methodical strokes.
- Light, Even Pressure: Unlike the rake, which can handle a bit more deliberate movement, the slicker brush requires a very light touch. You want to skim the surface of the coat, not dig into the skin.
- Brush in Sections: Just like with the rake, work in small, manageable sections. This allows you to be thorough and prevents missing spots.
- Brush with the Lay of the Fur: Always brush in the direction that the hair naturally grows. Brushing against the grain can pull hair and cause discomfort.
- Focus on Surface Tangles: If you encounter a minor tangle, gently work around it, using short, light strokes, gradually teasing the knot apart. Never pull harshly, as this can break hair and hurt your Husky. For stubborn knots, you might need a detangling spray or a comb first.
- Check for Snags: Listen and feel for any snags. If the brush catches, stop and investigate the area with your fingers.
- Brush Regularly: A slicker brush can be used more frequently than an undercoat rake, even daily, for general tidying, especially on areas like the ruff, legs, and tail where surface tangles are more common. This can prevent small tangles from becoming big mats.
Combining the power of the undercoat rake with the refining touch of the slicker brush will leave your Husky's coat not only free of excess undercoat but also beautifully smooth and healthy.
A Step-by-Step Guide to Grooming Your Husky with Rakes and Slickers
Grooming a Siberian Husky might seem like a daunting task, especially with their impressive double coat. However, with the right tools and a systematic approach, it becomes a manageable routine. Here’s how to tackle it effectively.
Preparation: Setting Up for Success
Before you even touch a brush to your Husky, a little preparation goes a long way to making the experience positive for both of you.
- Choose the Right Environment: Pick a calm, well-lit area where your Husky feels comfortable. For serious shedding, consider grooming outdoors or in a garage if weather permits, to minimize fur dispersion inside your home. If indoors, lay down an old sheet or blanket for easier cleanup.
- Gather Your Tools: Have your undercoat rake, slicker brush, a wide-toothed comb (for checking for mats), a spray bottle with water (or a detangling spray), and plenty of high-value treats ready. A grooming table can be incredibly helpful for saving your back and keeping your Husky still, but the floor works too if your Husky is relaxed.
- Ensure Your Husky is Relaxed: A tired Husky is a compliant Husky. Take them for a good walk or playtime session before grooming. This helps burn off energy and makes them more likely to stand or lie still. Offer praise and treats throughout the process.
- Inspect the Coat: Give your Husky a quick once-over with your hands. Feel for any large mats, burrs, or sensitive spots that might need extra care or pre-treatment. This is a good time to check for any skin issues.
- Lightly Mist (Optional): For some coats, a very light misting of water or a detangling spray can help reduce static and keep airborne fur down. Be careful not to make the coat wet, as this can make matting worse and defeat the purpose of undercoat removal.
Remember, consistency is key. Even short, positive grooming sessions regularly are better than long, infrequent battles.
The Rake-First Approach for Undercoat Removal
Once you're prepped, it's time for the main event: undercoat removal. This is where the undercoat rake truly shines.
- Start with the Least Sensitive Areas: Begin grooming in an area your Husky is generally comfortable with, such as their shoulders or back. Avoid delicate areas like the face, belly, or inside of the legs at first.
- Section by Section: Divide your Husky's body into imaginary sections. Work through one section at a time, using long, deliberate strokes in the direction of hair growth. Apply very light pressure, letting the rake's teeth do the work. The goal is to separate the loose undercoat from the healthy outer coat.
- Lift and Rake: For very dense areas, or when the coat is actively blowing, you might find it helpful to use your free hand to gently lift the topcoat, allowing the rake to reach deeper into the undercoat. You'll literally see handfuls of soft, fluffy undercoat coming out. This is exactly what you want!
- Clear the Rake: As the rake fills with fur, stop frequently to pull out the accumulated hair. This keeps the tool effective and prevents it from dragging or pulling.
- Watch for Mats: If the rake snags, you've likely hit a mat. Do not pull! Put the rake down and gently try to separate the mat with your fingers, or use a wide-toothed comb. For stubborn mats, you might need to use a mat splitter or even carefully clip it out with blunt-nosed scissors (always pointing away from the skin), but extreme caution is advised.
- Progress Systematically: Continue working through each section of your Husky's body: sides, chest, hindquarters, and tail. Be extra gentle around the tail, which can be sensitive. Avoid the face, top of the head, and ears with the rake.
During a heavy coat blow, you might need to do this intense raking every other day for a week or two. The amount of fur you remove will astound you.
Finishing Touches with the Slicker Brush
After the undercoat rake has removed the bulk of the loose undercoat, the slicker brush comes in to refine the coat.
- Go Over All Raked Areas: Using your slicker brush with light, even strokes, go over all the areas you just raked. This will catch any remaining loose hairs, smooth the outer coat, and help to distribute natural oils.
- Address More Delicate Areas: Now you can use the slicker brush on areas where the rake was too harsh. Gently brush the legs, paws, ruff (around the neck), and tail. You can also carefully use a small slicker brush on the cheeks and under the chin, being extremely careful around the eyes and muzzle.
- Check for Smoothness: Once you've gone over the entire coat with the slicker, run your hands over your Husky's fur. It should feel much smoother and look shinier. Use a wide-toothed comb as a final check, especially in common matting areas, to ensure there are no hidden tangles. If the comb glides through easily, you’ve done a fantastic job!
- Praise and Reward: End every grooming session on a positive note. Give your Husky lots of praise, cuddles, and their favorite treat. This reinforces that grooming is a positive experience, making future sessions much easier.
Remember that thorough grooming isn't just about appearance; it's vital for your Husky's skin health and overall comfort, especially in varying climates.
Troubleshooting Common Grooming Challenges (and Avoiding Pitfalls)
Even with the right tools, grooming a Siberian Husky can present its challenges. Knowing how to troubleshoot common issues and, more importantly, how to avoid pitfalls can save you a lot of headache and keep your Husky happy and healthy.
Dealing with Mats and Tangles Safely
Mats and tangles are an inevitable part of living with a double-coated breed like a Husky, especially if regular grooming falls by the wayside or during a heavy shed. They tend to form in high-friction areas: behind the ears, under the armpits, around the collar, and on the hindquarters or tail.
- Prevention is Key: The best way to deal with mats is to prevent them in the first place through consistent raking and brushing. During a Siberian Husky Coat Blow and the Six Weeks It Lasts, this might mean daily attention.
- Don't Pull: Never try to rip or pull through a mat with a brush or comb. This is incredibly painful for your Husky and can cause skin irritation or even open wounds.
- Finger Teasing: For small, loose mats, start by gently trying to pull them apart with your fingers. Work from the outside edges of the mat inwards.
- Cornstarch or Detangling Spray: A sprinkle of cornstarch or a good quality detangling spray (available at pet stores like Chewy or Amazon) can help loosen the hair fibers, making mats easier to comb out. Rub it into the mat, let it sit for a few minutes, then try to gently tease it apart.
- The Comb Method: Use a wide-toothed comb, working only a few strands at a time from the very tip of the mat. Hold the fur at the base of the mat close to the skin with one hand to minimize pulling on the skin while you comb with the other. Gradually work your way closer to the skin.
- Mat Splitter or Dematting Tool: For larger or denser mats, a specialized mat splitter (which has razor blades designed to cut through the mat without touching the skin) can be very effective. Use these with extreme caution and always read the instructions carefully.
- Last Resort: Clipping: If a mat is too tight, close to the skin, or causing discomfort, the safest option might be to carefully clip it out. Always use blunt-nosed scissors and insert them under the mat, parallel to the skin, pointing away from the skin. Cut upwards, never outwards. If you're unsure, it’s always best to consult a professional groomer or your vet, as improper mat removal can cause serious skin injury.
The Dangers of Over-Raking or Improper Technique
While undercoat rakes are indispensable, they can cause harm if used incorrectly or excessively.
- Skin Irritation and Rake Burn: Applying too much pressure, using the rake too aggressively, or raking the same spot repeatedly can cause "rake burn" – skin irritation, redness, or even abrasions. Huskies have delicate skin underneath their dense fur. Always use a light hand.
- Damaging Guard Hairs: The undercoat rake is designed to go through the guard hairs. If used too roughly, or if the rake's teeth are too sharp or close together, it can cut, break, or pull out healthy guard hairs. This can compromise the protective barrier of the coat and even lead to thinning patches.
- Causing Discomfort: A Husky that has a negative experience with grooming tools will become resistant to future sessions. Always prioritize your dog's comfort. If they show signs of pain, discomfort, or excessive stress, stop, reassess your technique, and try again later or consult a professional.
Listen to your dog. Huskies are vocal and will let you know if you're hurting them. A little grumble or shifting is normal, but yelping, snapping, or trying to escape are clear signs to stop.
Why Shaving is Never the Answer for a Husky
It might seem like the easiest solution to combat extreme shedding or to keep your Husky cool in summer: just shave it all off. However, shaving a Siberian Husky's double coat is one of the biggest mistakes you can make for their health and comfort. Why You Must Never Shave a Siberian Husky details this further.
- Loss of Insulation: Their double coat acts as both a cold insulator and a heat regulator. The dense undercoat keeps them warm, but the guard hairs also prevent direct sunlight from reaching their skin, trapping a layer of cool air and protecting them from UV rays. Shaving removes this natural protection, making them more susceptible to overheating and sunburn.
- Coat Damage: A shaved Husky's coat often grows back incorrectly. The undercoat grows faster than the guard hairs, leading to a wooly, uneven texture that is prone to matting and doesn't shed properly. It can take years, if ever, for the coat to fully recover its original texture and function.
- Increased Risk of Skin Problems: Without the protection of their guard hairs, their skin is exposed to the elements, increasing the risk of sunburn, insect bites, and various skin irritations or infections.
- Hypothermia Risk: In winter, a shaved Husky will quickly become dangerously cold, as they no longer have their natural insulation.
Instead of shaving, focus on effective de-shedding with your rake and slicker brush, providing plenty of shade and water, and timing walks during cooler parts of the day. Proper grooming removes the dead undercoat that traps heat, allowing air to circulate, which is far more effective and healthier than shaving.
Choosing the Right Tools for Your Husky
Navigating the vast array of grooming tools can be overwhelming. Knowing what features to prioritize when selecting an undercoat rake and a slicker brush will ensure you invest in tools that are effective, durable, and safe for your Siberian Husky.
What to Look for in an Undercoat Rake
An undercoat rake is a workhorse, and you want one that can stand up to the challenge of a Husky's coat.
- Durable Construction: Look for tools made with sturdy materials. The teeth should be securely set in the head, and the handle should be ergonomic and comfortable to hold, as you'll be using it for extended periods. Plastic handles that flex or feel flimsy are usually a bad sign.
- Appropriate Tooth Spacing: For a Husky, teeth that are too close together will pull and snag too much healthy fur, while teeth that are too far apart might not be effective enough at grabbing the loose undercoat. A medium to wide spacing is generally ideal. Some rakes come with interchangeable heads, offering different tooth configurations.
- Blunt, Smooth Teeth: The tips of the rake's teeth should be rounded or blunt, not sharp. This prevents scratching your Husky's skin during grooming. Run your finger over the teeth to feel for any sharp edges.
- Size: A rake with a head that's about 3-5 inches wide is typically a good size for efficiently covering a Husky's body without being too cumbersome for smaller areas.
- Ease of Cleaning: While not a deal-breaker, a rake that's easy to clean of accumulated fur will make your grooming sessions less frustrating.
Features of a Good Slicker Brush
Your slicker brush should complement the rake, providing a finishing touch that smooths and shines without irritating.
- Flexible Pins with Protected Tips: The pins should be fine and flexible enough to reach through the topcoat but not so stiff that they scratch the skin. Ideally, the tips of the pins should be coated or rounded to prevent irritation. Test it on your own forearm.
- Self-Cleaning Mechanism: Many slicker brushes now feature a button that retracts the pins, allowing you to easily wipe away collected fur. This is an incredibly convenient feature that I highly recommend, saving you from picking out fur piece by piece.
- Comfortable Grip: Like the rake, an ergonomic handle is crucial for comfort during longer grooming sessions.
- Size: A medium to large slicker brush (with a head roughly 4×3 inches or larger) is efficient for a Husky, allowing you to cover larger areas quickly. Smaller ones can be useful for legs and face.
- Pin Density: A dense arrangement of pins is effective for catching loose fur and smoothing the coat.
Remember, a good grooming tool isn't necessarily the most expensive, but it's one that's well-made, designed for the task, and comfortable for both you and your Husky. These tools are often part of the initial Grooming Tools a Siberian Husky Owner Buys Once.
Where to Find Reliable Grooming Supplies
Finding quality grooming tools has never been easier thanks to online retailers and dedicated pet supply stores.
- Specialty Pet Stores: Local pet stores often carry a good selection of grooming tools and can offer personalized advice. You can physically inspect the tools before buying, which is a huge plus.
- Online Retailers: Websites like Chewy and Amazon are fantastic resources, offering a wide range of brands, styles, and price points. You can read reviews from other Husky owners, which can be incredibly helpful in guiding your decision. For instance, Chewy often has detailed product descriptions and customer photos.
- Professional Groomers: Your local professional groomer might sell the tools they recommend and use themselves. They can also provide demonstrations on how to use them correctly.
When shopping, always prioritize functionality and safety over flashy branding. A basic, well-designed undercoat rake and a self-cleaning slicker brush will serve you and your Husky far better than a gimmicky, expensive tool that doesn't effectively do the job. Investing in good tools makes the necessary task of grooming your Siberian Husky a much more positive experience for everyone involved.
Disclaimer
This article is for general informational purposes only and does not constitute professional advice. Laws, prices and regulations vary by location and change over time. Consult a qualified professional for guidance on your specific situation.